Jeremy loves Chicken Parm. I on the other am not so crazy about anything with marinara sauce on it. I decided to cave though and make him his favorite. While looking for a recipe, I came across this one over at Emily Bites. It's a "healthier" version of this Italian classic, and I'm not going to lie, it was pretty good :) Jeremy was pleased too ;)
Chicken Parmesan
Source: “I Can’t Believe It’s Not Fattening” by Devin Alexander
Ingredients:
2 (4 oz) boneless, skinless
chicken breasts, pounded to ½ inch thickness
1/3 c reduced-fat
buttermilk
Olive Oil Spray (from a
spray bottle like a Misto, not a store bought pre-filled one that contains
propellant)
1 oz Fat Free Italian or
Caesar seasoned croutons
¼ c low fat marinara
sauce
½ oz
finely shredded reduced-fat mozzarella cheese
1 t grated Parmesan
cheese
Directions:
1. Place the chicken
breasts in a medium Ziploc bag. Pour the buttermilk over the top and seal it
shut. Put them in the refrigerator and let them soak for at least 6 hours, or
overnight, turning the bag over 1-2 times.
2. Pre-heat the oven to
450. Lightly mist a baking sheet with olive oil spray. Add the croutons to
another Ziploc bag and pound them with the rolling pin, meat mallet or other
flat, blunt object until crushed into very fine crumbs. Transfer crumbs to a
medium shallow bowl or plate.
3. Remove a chicken
breast from the bag and let any excess buttermilk drip off. Dip it into the
crumbs, rotating it to cover the breast completely. Place the breaded breast on
the baking sheet. Repeat with the remaining breast. If crumbs remain in the
bowl, press them into the tops of the breasts. Lightly spray the tops of the
chicken with olive oil spray. Bake them 5 minutes and then carefully, being sure
not to remove coating, flip them. Lightly mist the tops with spray and continue
to bake for another 2 minutes and then top each breast with half the sauce, half
the mozzarella and half the Parmesan. Continue to bake 3-5 minutes or until the
cheese is melted, the coating is crisp and the chicken is no longer pink inside.
Serve immediately.
Showing posts with label recipes. Show all posts
Thursday, August 2, 2012
Wednesday, July 25, 2012
Guy Food
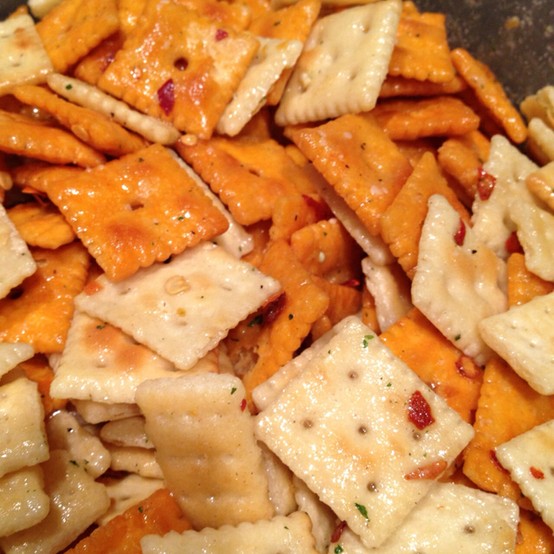
I LOVE to cook and what makes it even more fun is that Jeremy LOVES my cooking :) I love trying new recipes on him, and in my quest I found the ultimate snack food. Thanks, Pinterest.
They are called "Firecrackers"
Let me tell you... these things are good and addicting. And, not so healthy. So don't make them if you're on a diet. Oops I just made Jeremy some for his trip after he declared he was on a "diet". Ha!
What you need:
1/2 Box White Chedder Cheez-its
1/2 Box Chedder Cheeze-its
1 sleeve club crackers broken in half.
1 pkg Spicy Ranch Seasoning
2-3 heaping tablespoons Crushed Red Pepper
1/2 cup Vegetable Oil
Put all crackers in a galloon zip lock bag.
Mix ranch seasoning and crushed red pepper with the vegetable oil.
Pour over crackers, and mix (turning in your hands) for a good while.
Lay flat on a counter and let sit overnight turning over ever so often.
Enjoy!
These get better the longer they sit, so after 2, 3 days they are even better than on day one! I like the club crackers but Jeremy doesn't so if I'm making them for just him I leave out the club crackers and just add more cheeze-its.
Perfect tailgate snack for football season coming up :)
Let me know if you made them and what you think!!
They are called "Firecrackers"
Let me tell you... these things are good and addicting. And, not so healthy. So don't make them if you're on a diet. Oops I just made Jeremy some for his trip after he declared he was on a "diet". Ha!
What you need:
1/2 Box White Chedder Cheez-its
1/2 Box Chedder Cheeze-its
1 sleeve club crackers broken in half.
1 pkg Spicy Ranch Seasoning
2-3 heaping tablespoons Crushed Red Pepper
1/2 cup Vegetable Oil
Put all crackers in a galloon zip lock bag.
Mix ranch seasoning and crushed red pepper with the vegetable oil.
Pour over crackers, and mix (turning in your hands) for a good while.
Lay flat on a counter and let sit overnight turning over ever so often.
Enjoy!
These get better the longer they sit, so after 2, 3 days they are even better than on day one! I like the club crackers but Jeremy doesn't so if I'm making them for just him I leave out the club crackers and just add more cheeze-its.
Perfect tailgate snack for football season coming up :)
Let me know if you made them and what you think!!
Subscribe to:
Posts (Atom)